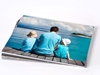
Nulab Digital Express is a powerful cross platform application utilising the Java framework. It has been designed from the ground up to enable you to effortlessly submit your orders from anywhere in the world, 24/7.
This software is designed specifically for medium to high volume users who are time sensitive and require overnight shipping upon order completion. NuDE is a simple file uploader, perfect for photographers who can prepare files confidently.
Our software interfaces with many studio applications such as StudioPlus, JAD, Timestone, Proselect and TDA
CUSTOM SIZES, COLOUR CORRECTION, RETOUCHING SERVICES are available
To ensure the best possible print quality for orders placed via NuDE, please follow these File Specification Requirements:
Image Mode: RGB colour not CMYK or Grey-scale
Colour profile: sRGB (not Adobe RGB or ProPhoto)
An 8 bit JPEG saved with Quality 10-12 (If you request Colour Correction on multiple layers, a PSD file is required)
300 DPI at desired print size e.g. 4x6” = 1200x1800 pixels or 20”x30” = 6000x9000 pixels
File must be supplied in correct Size Ratio or cropping may occur (we crop from optical centre)
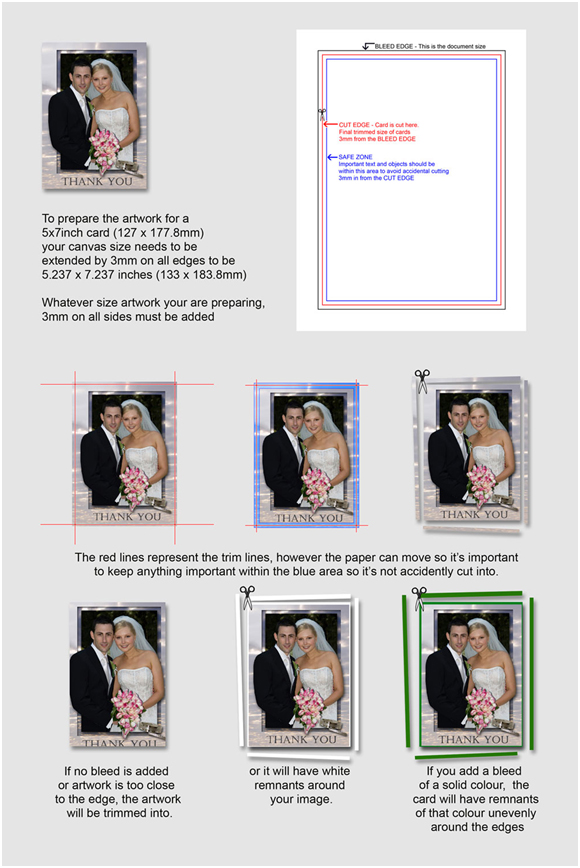
3mm Bleed with 5mm Safe Area
Setting up your Photoshop colour settings is simple and well worth your time.
Need further assistance? Contact the service team on 1300-303-320 or service@nulabgroup.com.au
![]()
Nulab Digital Express relies on the Java Run-time Environment for its functionality. You will need to have the current version of Java installed on your system to run our software.
Please visit Sun web site to install Java on your system.
Java is an industry standard, cross platform, and free web based language that is supported by all current browsers and operating systems.
Please click here to download a help sheet in PDF format (2mb) for some easy to follow instructions. Placing your order is a process of simple steps. Please follow the steps carefully and you should have no difficulty. However, as always, please call or email our friendly customer service team if any assistance is required.
![]()
Toll Overnight Service is an overnight delivery service to most metro and country destinations. Prices vary depending on size, weight, quantity and location and start at $17.50. IMPORTANT: Please note that if there is no-one in attendance to receive the delivery the courier will charge a re-delivery fee which will be passed onto you. Toll Overnight Service allows your order to be tracked.
The charge for orders (or a maximum size of 2.5”x20”x24”) is $23.00*. The charge for items exceeding 3kg is calculated depending on size and weight measurements of the package. Shipping prices are subject to change without notification.
When shipping please consider how many orders you are placing and always mark them (Order 1 of 2, Order 2 of 3, Order 3 of 3 etc.) in the Comments box, this will make combining your orders for shipping a lot easier and select HOLD ORDER PENDING INSTRUCTIONS until your last job is submitted, then you may choose ship upon completion.
![]()
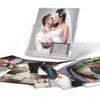
Pic A Pacs: $30.00 minimum per order
Only one file per template. Please note: cropping ratios within packs may vary. Crop your file to fit all variable crops in your chosen package.
Digital Previews
Digital Previews are of 14 fixed sizes and have a minimum order of 36 prints.
For current pricing please read our pricelist.
![]()
8 X 10 Magnetic Box
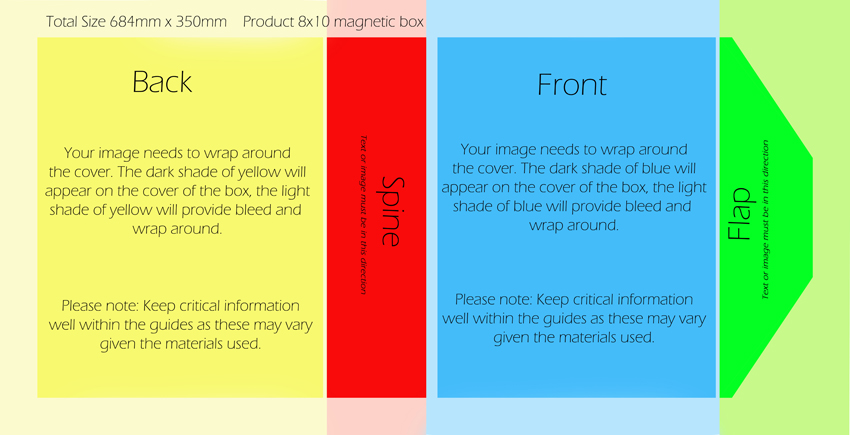
Click on the image to download high resolution template
11 X 14 Magnetic Box
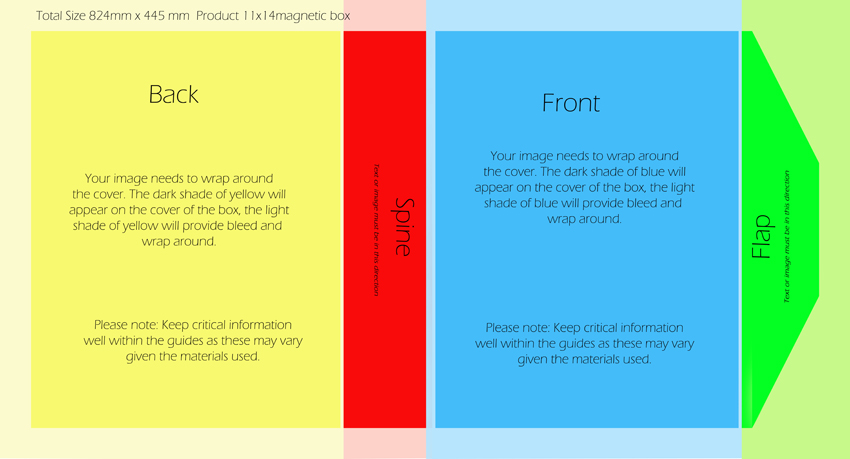
Click on the image to download high resolution template
![]()
Your work environment greatly influences how you see your files on screen and in print. For best results you need to keep your surrounding colours as neutral as possible. The colours of the walls and ceiling in your work space can greatly affect how you see colour on your monitor. The colour of your clothes reflecting back on to your monitor can also affect this.
Please set your desktop display to neutral grey as bright colours and patterns can also affect how you view your images.
We highly recommend using a Spyder Colourdata calibrator for your monitor. This device cost a couple of hundred dollars and will provide a comfort level that what you are seeing is the same as you will see in your prints from Nulab.
Datacolor Spyder 5 Pro – calibration tool available from Kayell click here.
The Spyder Display device attaches to the front of your monitor and reads colour patches displayed by the software. Using these readings, the software helps optimize the brightness/contrast/colour output, removes any colour cast from your screen, and creates a profile describing how your monitor displays colour.
When calibrating your monitor, set your target white point and Gamma curve to 5000k and Gamma to 2.2. All files must be submitted in sRGB colour space.
After the monitor has been calibrated verify the calibration process by placing a small test print order. We recommend using images that you generally shoot. Compare the test prints with the monitor.
Lastly, because of ongoing use, we strongly recommend calibrating your monitor every 2-4 weeks.
To make it easy for you to work through this procedure we have prepared a PDF document for you to download and keep on hand, also below is a link to our current profile and calibration images that you will need to download and use.
![]()
With visual calibration compromises will need to be made in how close your prints will match your display. How you see colour and hardware limitations all contribute this method not being an exact science, though this method is better than no calibration at all.
To get started using this method you will first need to submit your four free 8x10 prints to Nulab, when you receive them back you will need to compare them to the files on your monitor. Remember your files on your monitor need to look like the prints you have received back from us. You will need to use the buttons/dials on your monitor.
Before you start making adjustments write down your monitors values, this will be handy in case you need to go back to your original settings. Set your monitor to 5000 degree Kelvin as the display temperature. 5000K is chosen because it is closest to daylight.
Look at your print and notice what disturbs you the most about it, is it too bright, too dull or contrasty? Adjust this first do not be afraid of making big adjustments. At first make large adjustments to see if you are using the correct tool. When you have determined you are making the correct adjustment make smaller adjustments until you are happy that the file on your monitor look more like the print. Once you are happy with your first adjustment continue to work through anything else you do not like about the print.
Remember there is no calibration method that is perfect; the best that can be accomplished is a reasonable representation of the print. To verify your calibration is correct order a couple of more prints to compare to your monitor now that you have adjusted it.
Yes. All products require some final trimming of pages (up to 3mm from every side), so they can be neatly finished. Be careful of critical image detail left on the edge of your pages. The area that may be trimmed is referred to as ‘bleed’. See below for more information.
![]()