It takes just a few minutes to complete the registration form on the Join Us page. Once your application is processed you will receive a confirmation email containing your log-in details and the coupon code for your welcome offer. If this email does not hit your inbox within a few hours please check your junk/spam folder as it may have been filtered into there.
The “fair usage” principle applies when using Nulab services, extra charges may apply to packaging if deemed necessary.
Lustre paper is a cross between a matt and glossy paper and is one of the highest quality papers within the printing industry.
Photo Gloss paper has the true look and feel of a professional glossy photographic print.
Photo Matte paper is matt laminated to give a true matt finish. Matt prints desaturate the overall look and feel of the print.
Metallic paper adds a unique flair to your photographs. A high contrast 'chrome on paper' look, metallic paper adds extreme vibrancy to colours giving your image greater details and depth.
Art Paper is a finely textured paper that feels slightly rough to the fingertip.
Oyster Pearl Paper is a pearlescent paper that adds a 'shimmer' to your images.
Please note the below estimated service times do not include delivery.
| Lustre, Gloss and Matte prints | 1-2 working days |
| Metallic, Art paper and Oyster Pearl prints | 3-5 working days (printed once a week on Friday) |
| Acrylic Blocks | 2 working days |
| Acrylic Mounts | 7-10 working days |
| Calendars | 5 working days |
| Canvas Wraps and Panels | 6 working days |
| Framed Canvas Panels | 11 working days |
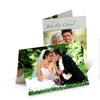
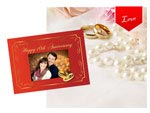
| Cards, flat and folded | 5 working days |
| Corporate Products | 5 working days |
| Event Printing | 4-5 working days |
| Framing | 10 working days |
| Mounting | 5 working days |
| Photo books | 5-10 working days |
| Photo Cut-outs | 10 working days |
| Photo Gifts | 5 working days |
| Pic a Pacs | 4 working days |
| Portrait Boxes | 2 working days |
| Signage POS | 5-10 working days |
| Stick-On Prints | 10 working days |
![]()
All of our printers work in sRGB colour space, so working in a larger colour space will not offer any real advantage in printing. We recommend that you set your entire workflow into the same colour space from your camera to your chosen editing program through to printing.
To achieve professional standard prints through Nulab we recommend you follow these guidelines:
Camera settings:
| Fine setting | sRGB colour space | High resolution |
| JPEG | Custom white balance |
Setting your camera this way will ensure correct file sizes for printing with us.
File preparation:
All files must be submitted in sRGB JPEG
300 DPI in the desired print size
OR
Allow the Nulab CLOUD software to provide you with a % rating regarding the quality of your file and use the edit icon to adjust or crop your uploaded image to the print outcome you require. You can crop and adjust your files within the cloud software.
Please ensure you leave a 3mm bleed.
All products require some final trimming of pages (up to 3mm from every side), so they can be neatly finished. Be careful of critical image detail left on the edge of your pages. The area that may be trimmed is referred to as ‘bleed’.
CLOUD COLOUR HELP: http://nulab.com.au/help/cloud-help#colour
NuDE COLOUR HELP: http://nulab.com.au/help/nude-help
The simple answer is no. It is nearly impossible to tell by eye a print made from a tiff or a high quality jpeg.